Pin Reaper: Sarah B.
Original Inspiration: http://www.instructables.com/id/Unicorn-Poop/
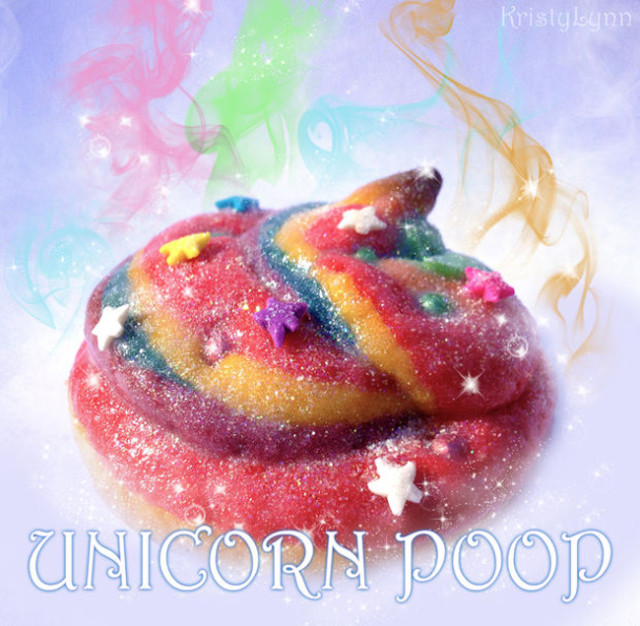
What I Did: I wanted to post these cookies for two reasons: 1) because they turned out so well and I was pretty darn proud of myself, and 2) because I keep seeing a lot of fail posts about the pinwheel cookies, and I imagine that the things that I discovered while making these will apply to making the pinwheels (or any other molded sugar cookie project).
I decided to make these for an event with a “Party Animal” theme where we all came dressed as different animals. I chose a Unicorn, and I remembered seeing these cookies all over pinterest, and they seemed fun. I read a bunch of posts and eventually went with the one you see linked.
I chose to use her recipe, including the shortening (I used butter flavored). That part is key. Shortening has a higher melting temperature than butter, so the cookies will not spread in the same way. The store bought dough probably has something akin to margarine in place of butter, so they will spread even more because of the water content.
After making the dough, I decided on 4 colors, using just the neon food coloring. I think the using the neon line of the McCormick food coloring helped make the vibrant colors. I divided it into 4 bowls and then mixed in A LOT of food coloring. Like a whole lot. The colors will fade a bit when they bake, so it will need to be really really intense in dough form.
After coloring, each ball of dough got wrapped in plastic wrap and put into the freezer for 30 minutes. After 30 minutes in the freezer, each of the 4 colored dough balls got cut into 8 smaller pieces. I kept one small ball of each color out and then put all the others in the fridge to stay cool. THIS IS KEY. Because they are being handled, they will get soft quickly, so the dough that is not directly being used needs to be kept in the fridge. The first few were hard to work with, until I figured out to keep putting the unused dough back in to keep chilling.
At this point there were I had 4 small balls of dough on the counter, one of each color, which each got cut into 2 pieces, that were then rolled into snakes. Make sure to use a lot of flour on your hands and the counter. It will look like it is dimming the color, but it will soak in during baking. This needs to be done gently, and gradually starting at the middle and working very gently to the ends. They should be no more than 5 inches long, or they will get too thin. They should be about the thickness of your pinkie finger. Also, you will want to roll them on the counter. Holding them up and rolling will make the ends break off.
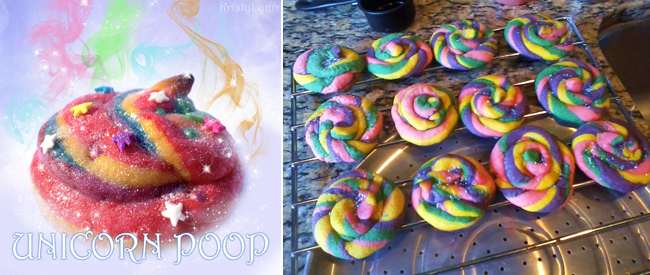
At this point I had 8 snakes total (2 of each color) which would result in 2 complete cookies. I then took one snake of each color and laid them side by side. The four snakes got rolled VERY GENTLY together to make one big multicolored snake (this part does not take much), and then twisted slightly by rolling the ends in opposite directions. They then got coiled up into poop shapes, which I did directly on the baking sheet. It took a few to figure out that the base should be relatively small so that as you coil it can get height. Sprinkles were added, and then they were baked. I only baked 4 cookies at a time, which was fine, because I could shape about 4 more cookies in the time that the first set baked and cooled.
This project seemed like it was going to be super complicated, but once I got the hang of it they ended up being relatively easy. I made two batches of the dough, which netted me 32 cookies. I mixed and colored the first batch, then it chilled in the freezer (so it would chill faster) while I mixed and colored the second batch. Then the second batch chilled in the freezer while I rolled and shaped the first batch. Overall the whole project took about 3 hours.
They were a big hit at the party, and seemed far more impressive than the amount of work it actually took.
My Result:

Next Time I Will: The cookies were a tiny bit salty, so I would cut the salt in the recipe down to 1/2 tsp. but otherwise I am going to keep this recipe for any molded or layer sugar cookie project in the future. These will definitely get made again.
I didn’t use the glitter gel that the original poster used because I didn’t feel like going to the craft store to get it when everything else was available at the grocery store. It was also a little expensive when I looked it up online, but I think it could be a nice final touch so I might try it next time.
Those look great! And the instructions are very detailed! I think I’ll try them and take them to my next party!
These turned out to be really cute. Why is this on the FAIL page!!??
I found the cookies were a little salty, too. I skipped the glitter gel layer, which made my poop cookies a fail. They were not sweet enough.
http://pinterest.com/pin/201254677071938765/
When I made these, I found the glitter gel at Target for only a few dollars, and the tube went a very long way when brushed on as a glaze.