Marbled Nails, Part 1
Marbled Nails, Part 2
Pin Reaper: Mindy
Twitter: twitter.com/Mindy_Utz
Original Inspiration: http://www.pinterest.com/pin/48484133461364739/, via http://dollarstorecrafts.com/2011/09/tutorial-marbled-nail-polish/
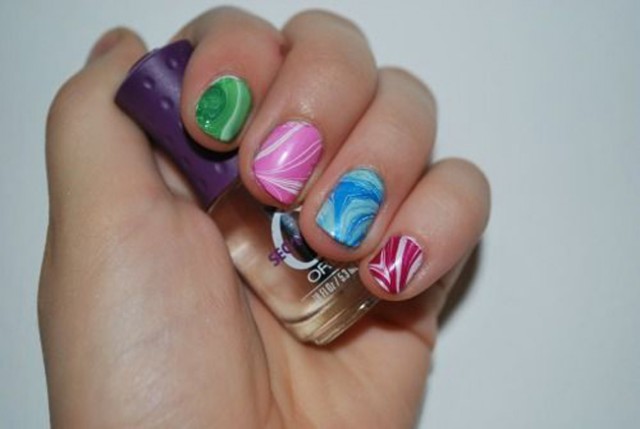
What I Did: I let water set until room temperature, quickly tried to add drops of polish, dipped nail in water, held there for a few seconds, then cleared the layer on top of the water, and pulled finger out…to a disaster. I only tried one nail at a time and only tried two. They were both a total flop. I created my own “Theirs -vs- mine” and posted it on Facebook. Instead of the jokes I was expecting…I ended up getting some asking if I was ok and what I got my fingers caught in. HAHAHA!!
My Result:

Next Time I Will: Save my OPI and just paint my nails like I normally do.

Poor choice in colors, you also didn’t layer it enough so you go big blocks of colors.
This is definitely one of those pins that make it sound super easy but then, yeah … total fail!
this technique does work, you just need the right temp water and right polish. it takes a lot of practice and trying to get the comb right. i watched 6 different youtube videos before i found on that gave me the best results
LOL - tried marbling w/ 3rd grade girls - their nails looked the same!! I think this is just one pedicure left best to professionals!!
This is my water marble nails. http://media-cache-ak0.pinimg.com/1200x/9f/fb/e9/9ffbe992b4b804fb2db65c4169c6867b.jpg And trust me I’m no professional! Takes a lot of practice and patience. And it still doesn’t always work for me. Sometimes they come out just like this fail 🙂
I had success with this, I followed an OPI tutorial. I used clear tape to tape each finger off first. I then layered my three colors on the water. I did 2 drops of each color but I did it twice so there are six rings. Also I used a toothpick to swirl it before sticking my fingers in. I stuck one finger in at a time and just redid the polish each time.